Pizza! Start to Finish! Is a promise we gave you in "trial run 2". We said we would revisit PIZZA in more detail and here we have! There's no food shortage in Barton's house. We say this because you can whip up some dough and throw all kinds of leftovers on top and call it a pizza! LOL
The boys and I have fun with this!
We use either a pizza stone or a pizza steal in the oven. We have both. Some people feel the need to let it cool down and remove it after use. We leave the stone/steel in there all the time. We cook right on top of it. Doesn't matter if its a sheet tray of cookies or a casserole in a glass dish.
Here's a recipe to get you started... Easy Bread and Pizza Dough Recipe

Season and Smash Grilled Chicken Technique
It will speed up your cooking time when you take it to the grill.
- The pieces are thinner, cooking faster
- Being uniform in thickness they can be flipped at the same time
- They will all be done close to the same time.
Let us know how we are doing. Tytus is getting better at filming and our next buy will be a microphone to make the audio better.
What else? Give us some constructive criticism.
- Do you like the banner on our Youtube page?
- Did you like the older one with the family better?
- How is the video?
- Do you know how to subscribe to our channel?
- Should we make an instructional video on subscribing?
- What DO or DON'T you like?
There you have a few starter questions to help you think about what we can work on.
Best Grilled Turkey Burger
Turkey burgers can be a hard thing. Some brands grind it to fine and the texture in your mouth can be dry and mealy. To conquer this, people like to add bread crumbs or eggs to bind them. Or trap moisture in.
I use a brand from Aldis that has good consistency. I do not use eggs or breadcrumbs. This allows more people to eat.
Sometimes Turkey lacks that good OOMF of meatiness that a beef burger gives. To add a level of that back into the burger, I have a few ingredient suggestions in the video.
Keep the Turkey mixture as cold as you can before grilling or pan-frying to keep it firm. But don't be afraid of a loose mixture. Work fast, patty quick, get it on the heat...it will get firm with cooking.
In this video, I realized I am not that glamorous to look at. That's ok. It's 2020 yall need something to laugh at! LOL
Salsa in 4 minutes and 4 ingredients!
Restaurant quality salsa made with 4 ingredients! This salsa takes 4 minutes or less to make. You can add as many extra ingredients as you like, but the taste is excellent by itself.
Tytus and I decided to put this video together as we were making some salsa for Nachos. We're also releasing it early in case you need a quick recipe for Taco Tuesday! LOL
Tell us about your favorite salsa and ingredients you like to add.
Waffles vs Pancakes
Why choose? Simple recipe and preparation of Waffles and Pancakes.
This episode we let Tytus do some of the videoing and Tyrone (dad) tries to quit saying "alright" during filming. Ezra will again make his appearance as the official taste tester. This episode was brought to you by The Hot Mess Kitchen Crew! and Spices by Sarah!
**We aren't being sponsored by them, we just like their products.
**We aren't being sponsored by them, we just like their products.
Simple Waffle and Pancake Recipe:
1 cup all-purpose flour,
2 tablespoons (or more) Honey
2 teaspoons baking powder
1 teaspoon salt
1 cup milk (a little less for waffles)
2 tablespoons unsalted butter, melted, or vegetable oil
1 large egg
1 Tablespoon vanilla extract (optional)
Things we noticed to work on next time:
Lighting (we see some sunlight bleach out some parts of the video)
Sound (sound can range up and down as we try to film at different lengths)
Lighting (we see some sunlight bleach out some parts of the video)
Sound (sound can range up and down as we try to film at different lengths)
BEST Grilled Cheese on a Burger Bun?
A grilled cheese sandwich is delicious! We eat tons of them. On a burger bun? We eat them on any kind of bread! We only need 3 ingredients: cheese, a form of bread, butter(...any form of fat? BACON FAT?). We can even get rid of the butter and still get a "toast" on the bread.
I thought it would be fitting to start the official first episode of The Bcookin Show with a classic. Grilled Cheese Sandwich. Toasted Cheese Sandwich if you prefer.
What is the best tasting version of Grilled Cheese Sandwich you have experienced or made? The most delicious grilled cheese is your own!
Have you ever tried shredding Cheddar or Monterrey cheese and using it on the outside of the bread? It crisps up real nice AND releases enough oil to replace the butter. Crispy cheese toast on the outside with a melted ooey-gooey center. Tytus discovered this technique a while back and he loves it.
We hope you enjoy the simplicity of our Grilled Cheese "how-to" video! In this "first" episode we managed to get the wide-angle or full use of the video screen. We also learned some more "tricks" about posting links and adding fun things to our editing.
I thought it would be fitting to start the official first episode of The Bcookin Show with a classic. Grilled Cheese Sandwich. Toasted Cheese Sandwich if you prefer.
What is the best tasting version of Grilled Cheese Sandwich you have experienced or made? The most delicious grilled cheese is your own!
- Smoked Gouda on multigrain
- Manchego on a baguette
- Sharp Cheddar on Sour Dough
- American on white bread...
Have you ever tried shredding Cheddar or Monterrey cheese and using it on the outside of the bread? It crisps up real nice AND releases enough oil to replace the butter. Crispy cheese toast on the outside with a melted ooey-gooey center. Tytus discovered this technique a while back and he loves it.
We hope you enjoy the simplicity of our Grilled Cheese "how-to" video! In this "first" episode we managed to get the wide-angle or full use of the video screen. We also learned some more "tricks" about posting links and adding fun things to our editing.
The Bcookin Show Too! (Pizza)
Tytus and I have made some improvements. I am getting a little better at editing and using the "thumbnail, end screen, subscribe button, watermark, and next video/playlist" add-ons for Youtube.
In this next video you may recognize some older clips that I pieced together. Eventually we will break it all down in newer shows but for right now we are getting the feel of things.
What does that mean? we will video more technique and recipe breakdown. Showing you how we do it.
- Make the dough,
- ingredients we use,
- equipment,
- tips and tricks...
But for now, thanks for being patient as we work this all out.
* Thank you Anne and Beth for emailing in your suggestions and comments! We appreciate the encouragement!
The Bcookin Show!
In the video, Tytus is toasting some premade biscuits baked earlier in the week. We often prep and cook food ahead of time and then mix and match. And yes, we also use the microwave to reheat. We opted for a small microwave with no extras. It has a power knob and a time knob. That's it. If it's more complicated than that we don't use it.
Tytus also knows that we use wood or non-metal utensils in our nonstick pans. But you know what? It's a perfect opportunity to encourage and reinforce doing the right thing.
Please leave or send us your comments and questions. info@tyronebcookin.com
- You want to see Tytus cook a certain food?
- Have any cooking questions you want Tytus or I to answer?
- Are there any techniques you would like to see?
- Interested in any of the tools or appliances we use?
Your participation will also help us develop which way this will go. We encourage your participation!
Stay TUNED we'll try to keep you posted at least once a week!
I'm BACK!

My oldest son Tytus, now 10, has shown an interest in cooking, computers, and doing some cooking videos. SO maybe we may do a few things here and see how it goes...
Oven Cooking - Chicken
For cooking chicken oven baking/roasting seems to be the best. I buy a 40 pound box of random chicken breasts (because its usually the cheapest way to buy it AND it doesn't come frozen). In the picture below you see I have covered three full sheet pans with aluminium foil and covered that with non-stick spray.

The inside of the case/box is usually four bags of chicken breasts. Usually huge in size, some still connected together like the shape of a set of lungs.

Lay them out on the sheet trays smooth sides up (actually it really doesn't matter but that's my preference) and season them liberally with Montreal Chicken seasoning or the seasoning of your choice. Good ole salt will do too!

It takes this chicken about one hour to cook at 375 degrees Fahrenheit. Then you can start checking the internal temperature with thermometer. AND/OR use the below kind of thermometer and set an alarm to go off when the internal chicken temperature is 165 or 170 Fahrenheit just for that extra push. After that check several thick random pieces with the Thermopen (thermometer) to make sure its done on all trays.

Depending on when your going to use the chicken let it cool on the speed rack or put it in the warmer. This is the same chicken we use for chicken salads, soft taco/burrito, chicken & pasta alfredo, chicken w'rice/egg roll...and can also be used for BBQ Chicken sandwich day. We change the lunch up by changing presentation, cuts, or sauces while using and cooking the chicken the same way. This keeps the ordering, cooking, and planning simple. A versatile cheap cut of meat.

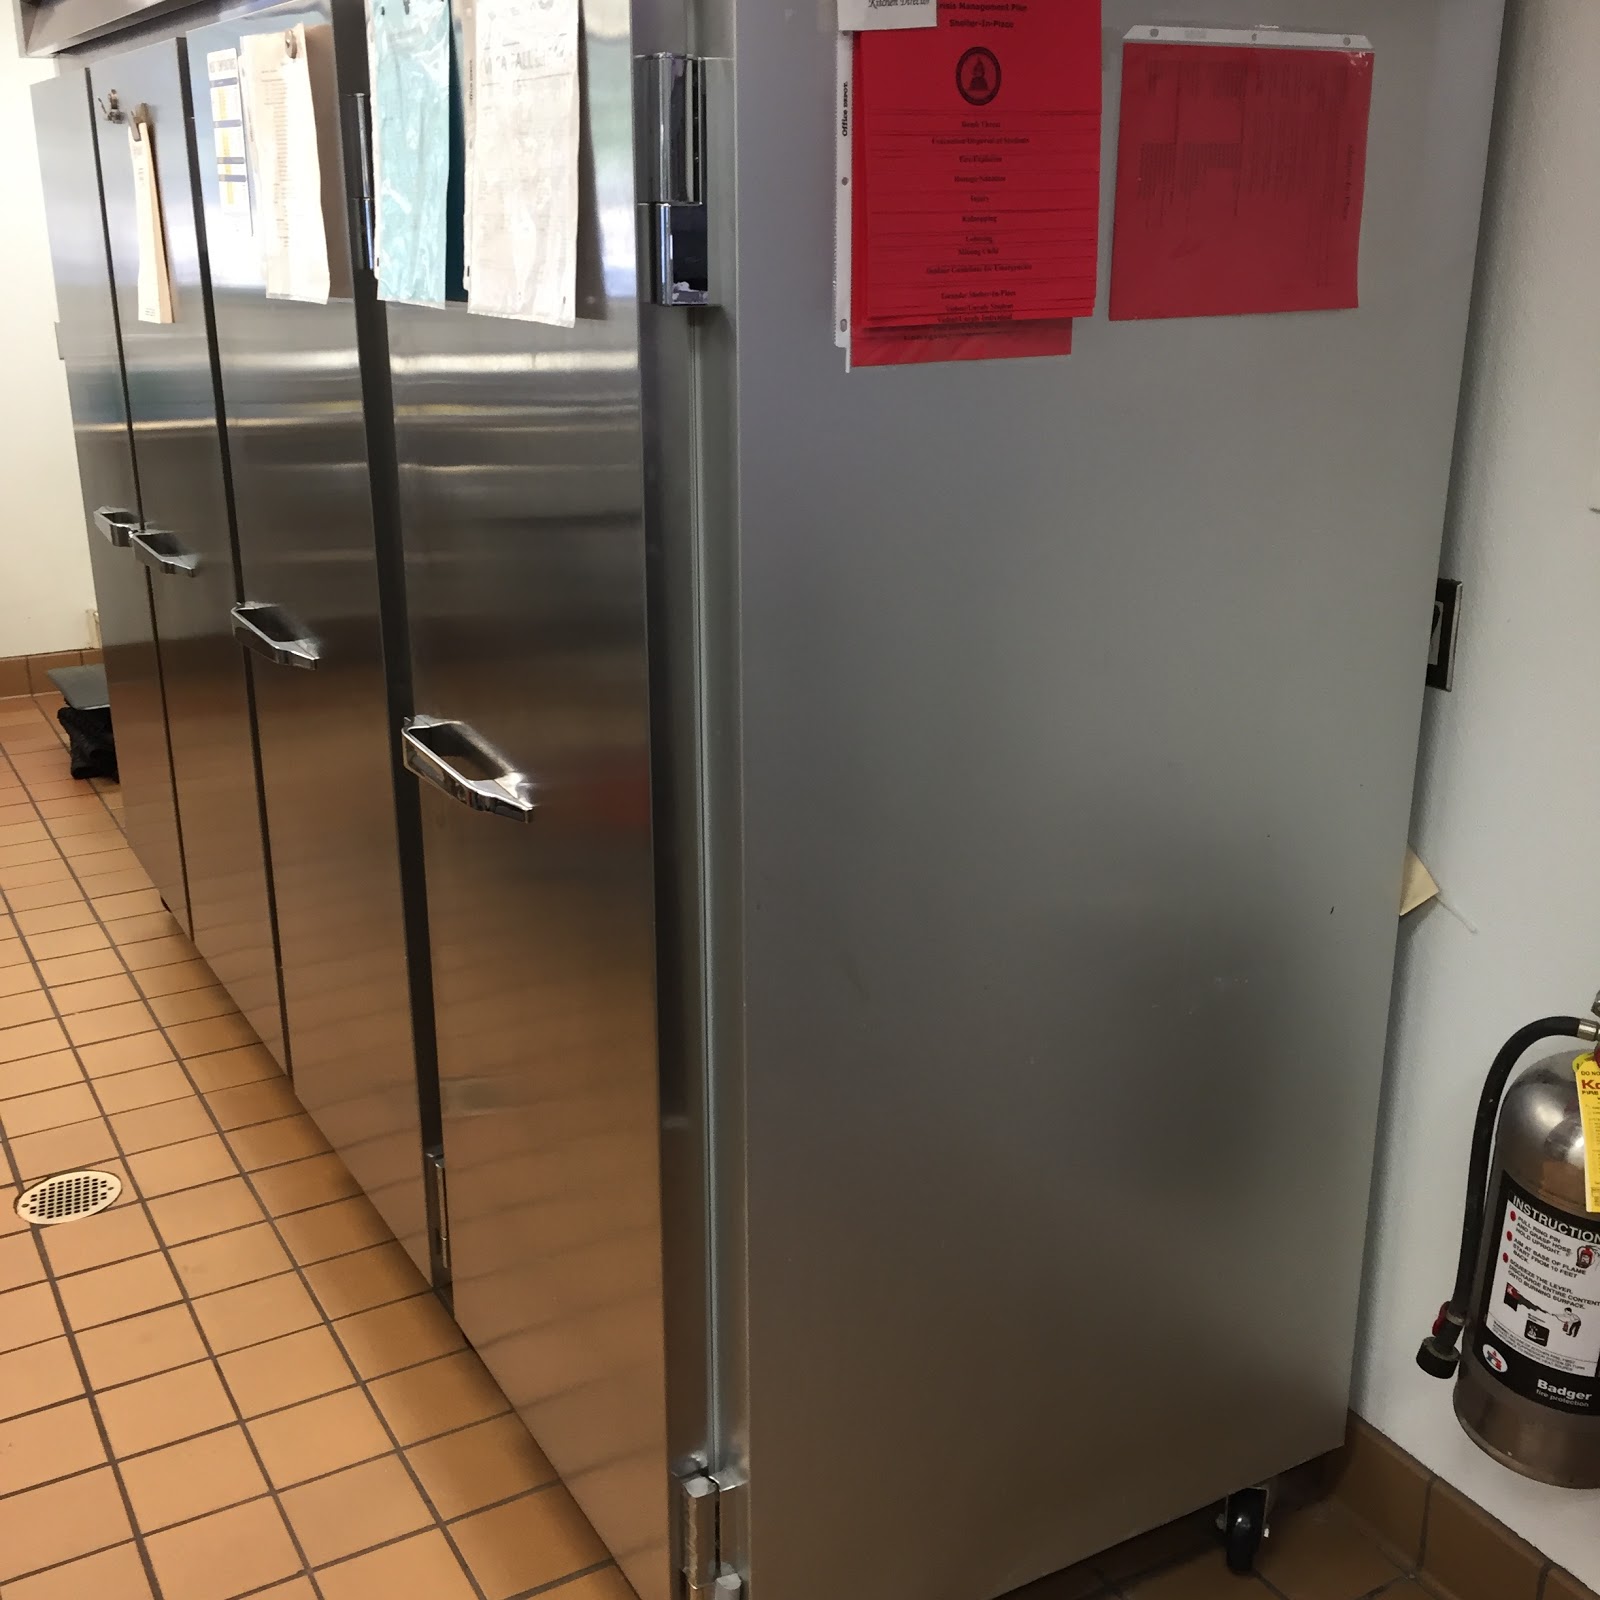
Scrubbing The Floor - Once A Month
To get started make sure and rinse the mop out real good first, then ring it out. You will need to use the mop one time in the beginning (behind the refrigerator and freezer after scrubbing) without having the bucket.
When using the mop bucket and a brush to scrub the floor I either use this...And follow directions on jug...

Or these two products...And use one cap full of bleach and 2 drops of Dawn AFTER filling the mop bucket with water.


If this mixture doesn't seem "sudsy" enough then add a little bit more lemon disinfectant (it has a cleaner in it) or a couple of ADDITIONAL drops of Dawn in the bleach water.
I make fresh mop water the same way. (minus any extra "suds")
Before scrubbing the floor let's remove all the unnecessary stuff in our way. The trash can by the sink and the culinary tool box...


Also the speed rack and alto-sham warmer in this area...

You can roll or carry it all out right outside the door and front of service window.

The best way to start is to quickly scrub the floor behind the refrigerator and freezer, mop it...

Then push it all back into place.
Now your ready to do the rest of the floor.

I wet the floor down with the brush and scrub small areas of the floor real good.

After getting everything scrubbed down (floor should not be flooded with water) go back and mop the whole floor. Use the same mop bucket just make some fresh mop water.
Staying in one area till all the excess water has been mopped up and floor is clean. Ring out the mop head as many times as necessary and continue to mop small areas at a time till the whole floor is done.
When you are through the floor should look pretty clean (or even more so) and not any more wet than a usual day of sweeping and mopping.
###
Through experience we found this the most efficient way to do it.
Efficient: achieving maximum productivity with minimum wasted effort or expense.
Once A Year - Exhaust Hood
About once a year the exhaust hood needs the intake air filters cleaned. The filters (2 of them) are on the roof and can be accessed through removing two screws on top of the intake unit.


Takes two screws to remove the top and to get to the filters to slide them out.

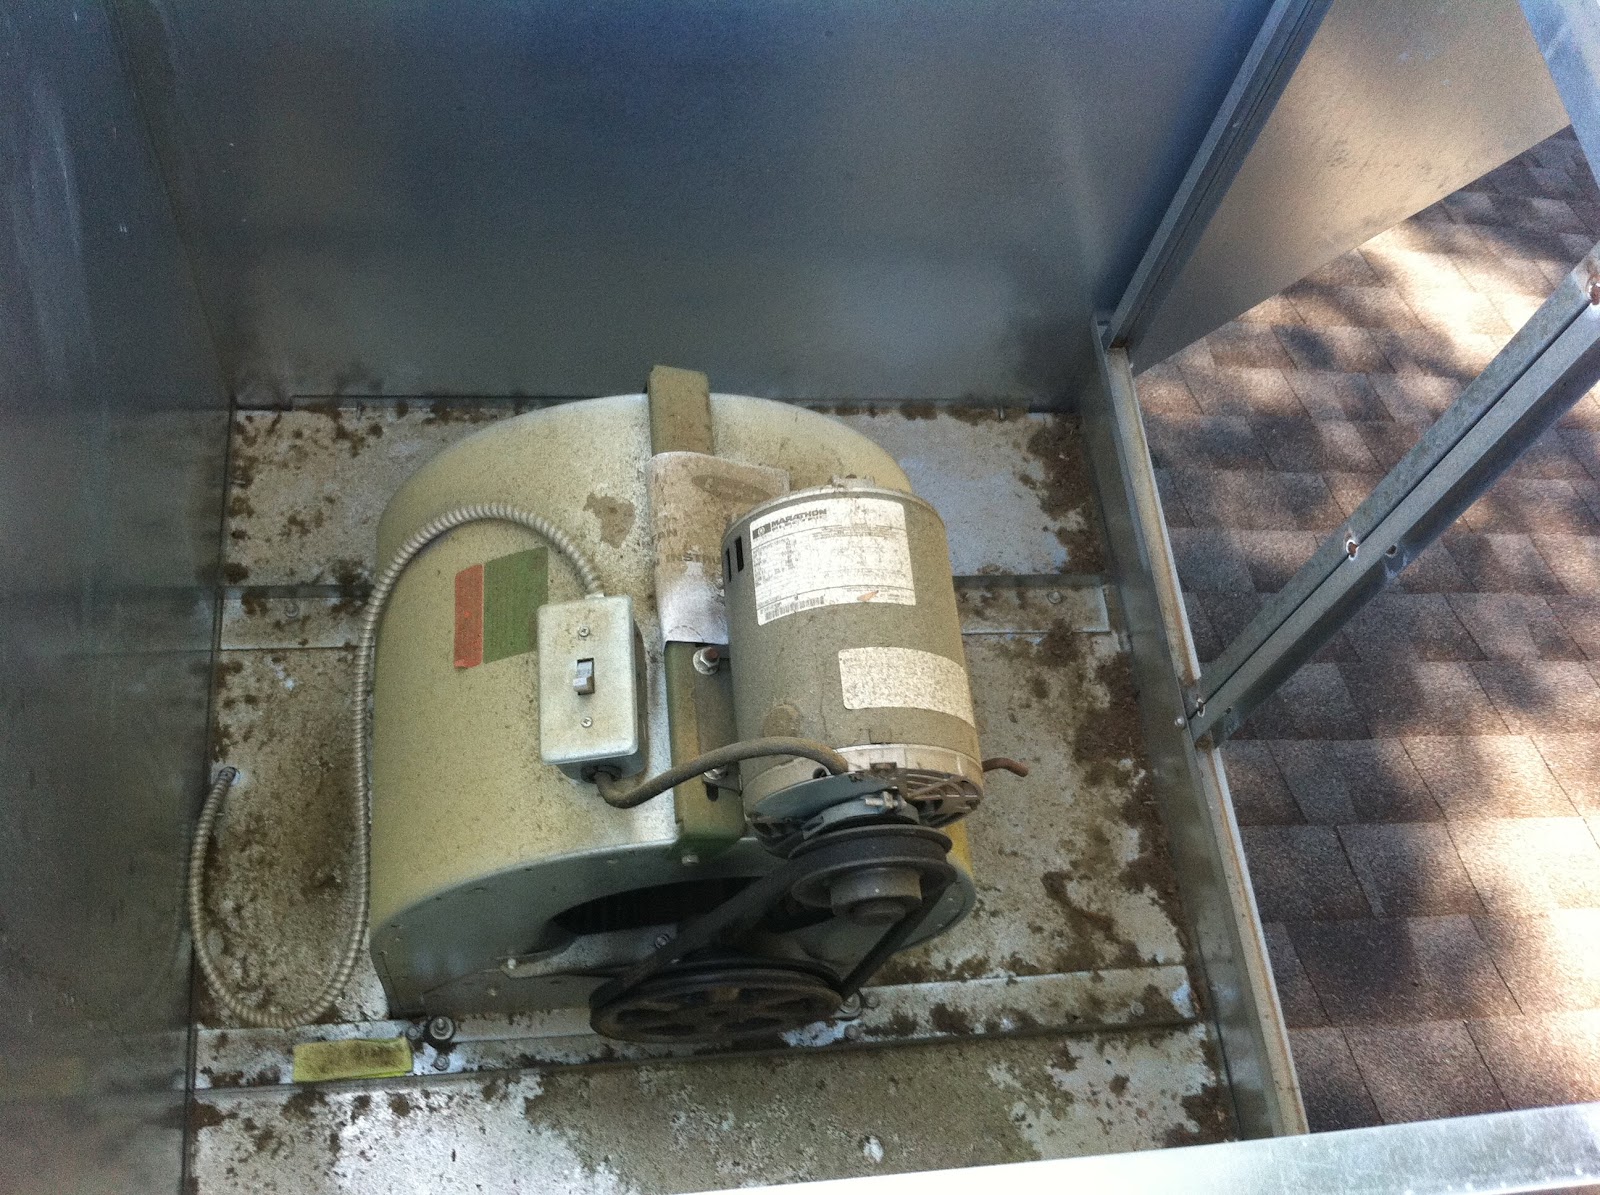
Here is the exhaust fan unit for the actual "exhaust". The belt, pictured below, can be bought at Grainger in town on Jordan Lane. (click the link) The belts are not that expensive so we just get them there. There may be other places you can purchase them. Always buy at least 2 at a time so there is always a backup. You can use a socket set or some hand wrenches to loosen and tighten the bolts in order to put another belt on BUT if the belt has already broken off I usually put the new belt all the way on the motor pulley and partially on the fan pulley and give it a quick spin and the belt will pop all the way on like a tight bicycle tire without ever having to use any tools.


Both the intake and exhaust unit have seperate electrical switches close to their motors so you don't have to turn the exhaust switch off in the kitchen to work on them. Just climb the ladder to the roof and switch off the one you want to work on.
Both Pastor Will Umbarger and Jim Cochran have some experience with this maintenance job so if you have any questions they should be able to help you out!
Dishwasher Use
Our dishwasher was never made for real heavy-duty dish washing. Mildly soiled dishes at best. It uses both detergent and sanitizer BUT because it doesn't have its own internal water heater it makes it harder to wash the dishes completely clean and/or remove a greasy film WITHOUT doing some pre-preemptive cleaning to the dishes before going in the dishwasher.
The hot water we use comes from a water heater and its output usually tops out at just above 120 degrees F. AND this just happens to be the temperature the Health Department looks for the on the gauge on the dishwasher when its running a cleaning cycle.
High-temp machines require an additional booster water heater to provide sanitizing hot water above 180° F (82.2° C) during the rinse cycle BUT this also cleans the dishes better during a regular wash cycle.
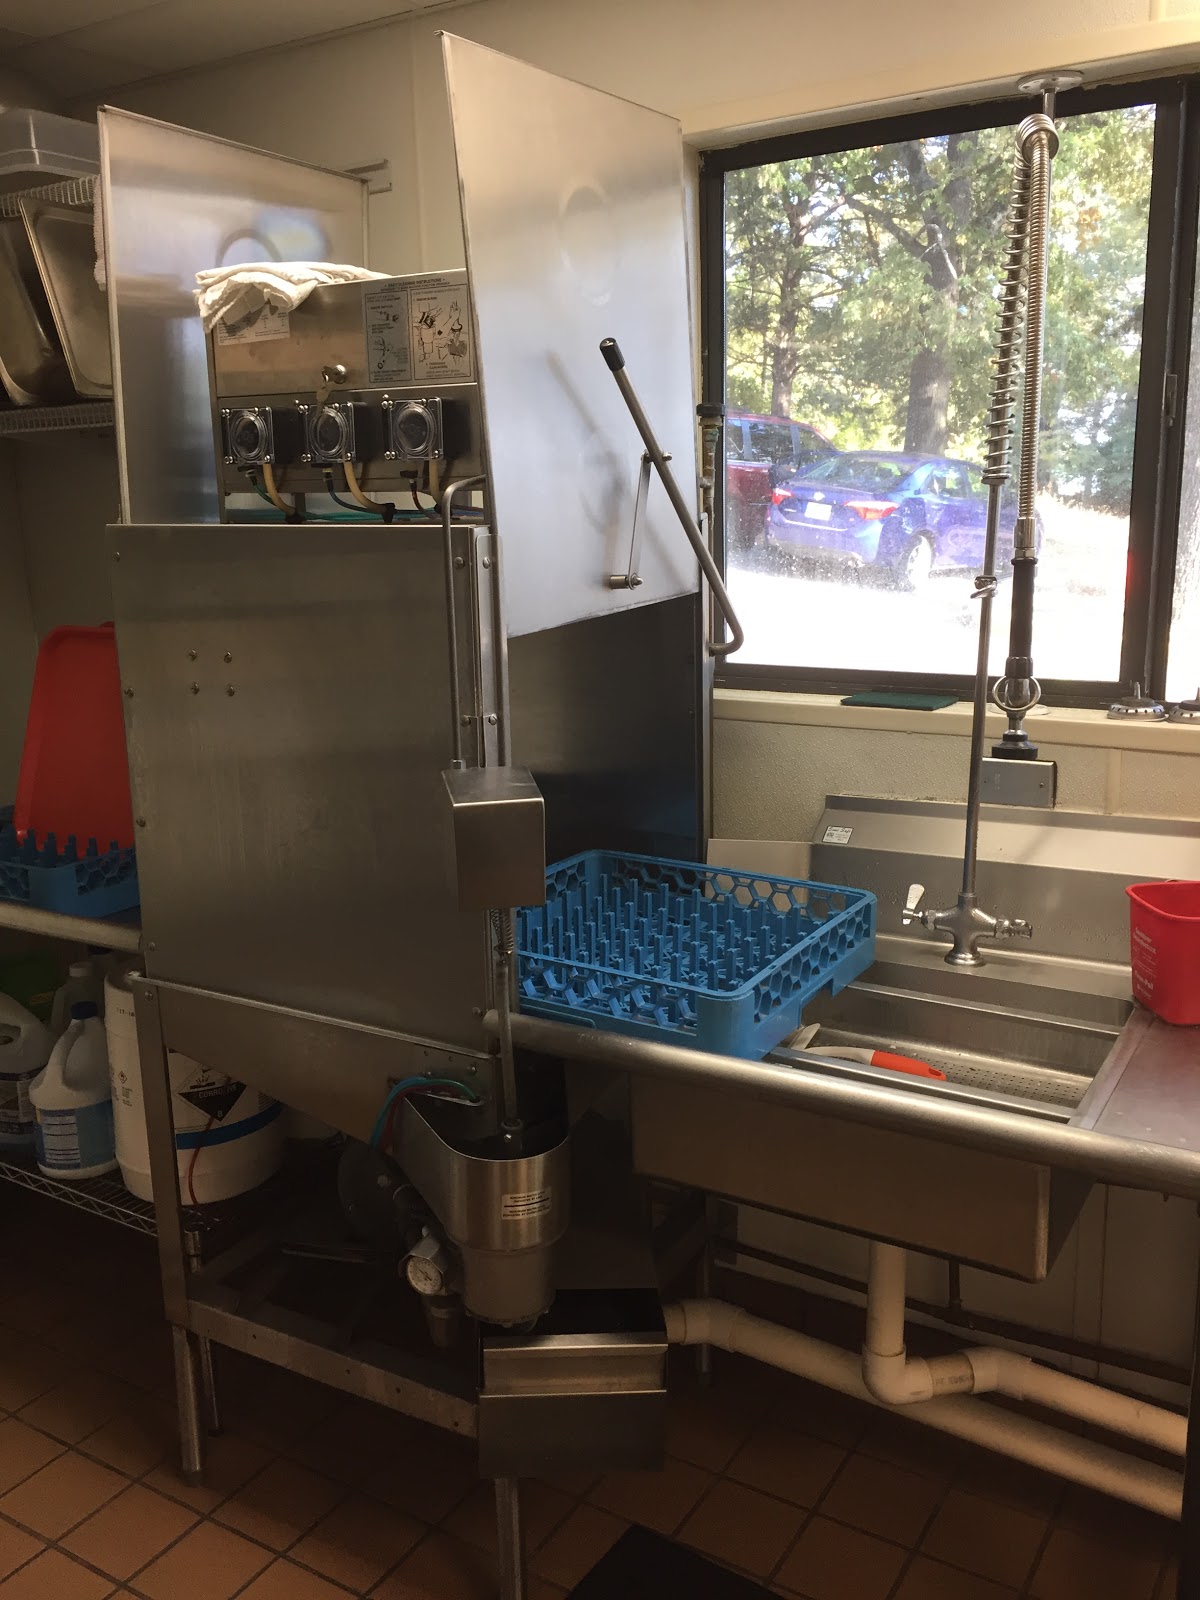
We use a detergent and a sanitizing solution. If you click on the picture of the two buckets I think it will enlarge enough for you to see the writing on them. Both of these can be ordered through Halsey or pretty much ANY food service company. (Sysco, US Foods, PFG...)

The dishwasher is also capable of running a "rinse aid" on one of the cycles. This is not necessary by the Health Department AND we have found that even when we use a "low-temp" rinse aid for our low-temp dishwasher it isn't very effective. It doesn't work well enough to justify the cost.
Subscribe to:
Posts (Atom)